Sunday, 1 November 2020

Kurzweil SP2x musical instrument -How to enter the boot block, how to replace the battery, How to remove the keyboard assembly, hard reset procedure


HARD RESET

There are two ways to perform a Hard Reset to the SP2X.

Press the Global button and press the Reset button segment displays following screen  and press + button segment displays an message. Press the + button again segment finally displays to    continue or the Yes or No button.

Software Updates

A computer with a MIDI interface and sequencer is necessary to transfer software to your SP2X units MIDI Sysex.

File Formats

Software upgrades are stored as standard MIDI files. Filenames are in the format SP2XVV.MID, where X is the software block and VVV is the version number (V.VV). The following lists the possible values for X. Never install files with names that don’t conform to this format; it won’t work.

bk—boot block for keyboard models

k—operating system software for keyboard models.

Installing the Operating System or Setups

Warning: This procedure requires performing a hard reset. All user programs and setups will be erased. Before continuing, be sure to save all user programs and setups.

1. Connect a MIDI cable from the MIDI Out port of the computer interface or sequencer to the MIDI In port on the PC2.

2. Open the first .MID file using the sequencer program.

3. Turn on the SP2X and follow the procedure to enter the Boot Block.

4. Press the Enter button to select “uOS”

5. The segment shows “uOS”. Start playing the MIDI file from the sequencer. While a file is loading, the bottom line of the display shows the progress. If the display continues to show after starting the sequencer, stop and restart the sequence.

6. After the file is loaded, the display will show “oK”.

7. If you have additional files to load, open the file from the sequencer and begin playing it.

8. Press the Cancel button twice to return to the main menu. Scroll to Hard Reset and select.

Installing a New Boot Block

Warning: This procedure performs a hard reset. All user programs and setups will be erased.  Before continuing, be sure to save all user programs and setups.

1. Connect a MIDI cable from the MIDI Out port of the computer interface or sequencer to the MIDI In port on the SP2X.

2. Using the sequencer program, open the first .MID file.

3. Turn on the SP2X and follow the procedure to enter the Boot Block.

4. Press the Enter button to select . 6. The segment shows . Start playing the MIDI file from the sequencer. While a file is loading, the bottom line of the display shows the progress. If the display continues to show  after starting the sequencer, stop and restart the sequence.

7. After the file is loaded, the unit will reset.

Replacing the Battery

The SP2X uses a flat three volt Lithium coin cell battery.  When the battery voltage runs low, the unit boots up with a low battery message.

Note: The battery voltage can be checked at anytime using the Scanner Diagnostics.

Accessing the Battery

1. Place the SP2X upside down on a flat protected surface.

2. Remove top assembly and set it safely aside.

Removing the Battery

The battery (CR2032) in the SP2X is mounted into a holder on the Engine Board and is accessible when the access panel is removed.

1.    Insert a flat plastic tool (plastic knife, pen cap, etc.) into one of the openings between the battery and the holder to lift the battery. 

2.    2. Ease the battery out of the holder. If necessary, insert the plastic tool at the bottom of the holder (closest to the Engine Board) to remove the battery.

Installing the Battery

1.    Position the battery over the holder so that the positive terminal is pointing to the Engine Board.

2.    2. Slide the battery into the holder and apply slight pressure until it snaps into place.

3.    4. Install the seven screws to secure the top assembly

SP2X Scanner Test

The Scanner Tests for the SP2X include separate tests for the front panel buttons and LEDs, front panel knobs including the Master Volume slider, the Mod and Pitch wheels, the keyboard, and the pedals.

To enter the Scanner Tests, first turn on the SP2X. Once the SP2X is on and ready to play, simultaneously hold down the Main, Layer and Split buttons. All front panel LEDs will flash and the segment will display the following:

Segment example, SP2X scanner tests

“SP2”, “SCn”, then “vX.Y” are displayed briefly in sequence vX.Y means version of the scanner installed the unit.

“bAt” means “Battery” and the voltage is X.Y volts. Normal battery voltage is around 3.0 volts where 3.2v is typical for a new battery and less than 2.8 means the battery is nearing the end of its life and has only a few months left. At 2.2 volts, warning will begin. A completely dead oe missing battery may not read exactly 0.0v but will certainly read less than 1.0v.

Next “PCH” then “XXX” is displayed in sequence. “PCH” means the Pitch(left) Wheel and XXX is its centre reading at poweron. Ideally this is 128 but anything between 120 and 136 is acceptable. New units should be adjusted to be between 126 and 130 to allow for drift over the life of the unit.

Last is a display of which option diodes have been installed. First “jPr” is displayed briefly then 4 vertical lines will show briefly. Each line represents an option diode from Opt1(leftmost) to Opt4(rightmost) A long line(2 segments long) mans the corresponding diode is installed while a short line(1 segment) is not installed. Option settings normally tell the scanner software the keyboard length and weight and should match the actual unit.

Front Panel Buttons

When a button is pressed, its LED(if any) turns on and its matrix address is shown in the display. Each press of Knob Mode will right the next Knob Mode LED in a top down sequences. Rhythm and Program button has two color led, each button press, RED and GREEN LEDs turns on alternatively.

Front Panel Knobs

When a knob or the volume slider is moved, its name is shown briefly then its changing value is displayed. The names are

“vol” – volume slider,

“KnA” – Knob A,

“Knb” – Knob B,

“KnC” – Knob C,

“Knd” – Knob D.

The name should be correct and the value numbers should run smoothly from 0(or 1) up to 255(254) as slider moved upward or the knob clockwise. When turned very slowly, the number display will typically change in steps of two(1,3,5,,or 2,4,6,,,,) and may even switch from even to 30 .

Keyboard Problems

Odd and back which is normal.  Big jumps of more than 3 counts which turning slowly may indicate a problem.  However, When the control is released, its last reading should remain without changing by more than 2 counts.

Keyboard

When a keyboard key is pressed, the key’s musical pitch should be shown in the display. The first character should be the note name .The second character should be blank for white keys or a “high o(sharp sign) for black keys. The third character should be the octave number from 0 to 8.  Thus Middle C will be shown as “C 4”

Besides the key name, the 3 decimal points in the display reveal important information about the rubber switches under the key being pressed. When the key is pressed partially, the left decimal point will indicate that the first rubber switch and made contact. When the key is pressed further, the middle decimal point indicates that the key is pressed further, the middle decimal points indicates that the second rubber switch has also made contact. Thus when a key is pressed slowly, the following sequence should be observed exactly 0.

Blank Display > Correct Key name and left decimal point > Correctly Key name and left and centre decimal points If the correct key name and only the centre decimal point lights, then there is a defect associated with the first switch. If all 3 decimal points light, then either more than one key is processing at

once or there is a short circuit in the connecting or on the connector.

Switch Pedals

If a single switch pedal is plugged into the SW jack, operating it should case a response in the display.   For Kurzweil pedals, pressing the pedal should cause “S1C” to be displayed while releasing it should cause “S1o” to be displayed.  Other vender’s pedals may cause the opposite response. If a dual pedal is plugged in, then the Sustain (right) pedal should display as described above. The Soft pedal (left) should cause “S2C” and “S2o” to display. As with the buttons, the display should respond immediately and without flickering if pedal working properly.

Continuous Pedals

If control pedal is plugged into the CC jack, operating it should cause the display to show “CP1” briefly then its changing values. As with the volume slide r and knobs, the value display should smoothly increase from 0 to 1 up to 254 or 255 as the pedal is pressed. This is the ideal range of a perfectly calibrated Kurzweil pedal. Many pedals may only reach 248250 which acceptable. All should go down to 0 or 1 however.

Removing the SP2X Keyboard Assembly

The following procedure assumes that the SP2X is open and that you have followed the instructions to remove the top enclosure.

1. The keyboard is secured to the bottom enclosure using nine screws. Refer to Figure  for the position of the screws. Arrows identify the locations of the nine screws.

2. Tilt the SP2X up and remove the five keyboard rear screws, then lay the SP2X flat on your work surface.

3. Move the SP2X forward so that the front hangs over the edge of your work surface to access the remaining screws, and remove the five keyboard front screws.

4. Remove the four Mod Wheel screws and washers. At this point the keyboard is loose in the bottom enclosure, but it has cables connected to the Mod Wheel Assembly and the Connector Board.

In some cases, tape secures cable connections or fastens cables to the bottom enclosure. Always peel back the tape from one side when disconnecting cables so that the tape remains properly positioned.

The removal and replacement of surfacemount devices requires training and the proper equipment. If you do not have the training or equipment to remove or replace surfacemount devices, contact the service department to order a board replacement. International service technicians should contact their appropriate Young Chang Distributor.

Saving User Data

1. Set up a MIDI recording device.

2. Connect the a MIDI cable to the MIDI Out port of the SP2X to the MIDI In port on the external device.

3. Press the Global button on the SP2X. Press the +/ cursor button until the segment displays 

4. Begin recording on the MIDI recording device.

5. Press Rythm on the SP2X. The segment shows

When all objects are saved, will appear in the display.

6. To reload the saved objects, connect a MIDI cable from the MIDI Out port of the recording device to the SP2X’s MIDI In port.

7. From the external device, begin the playback of the file.

Entering the Boot Block

Use the SP2X’s Boot Loader to enter Diagnostics or perform a Hard Reset to the unit. You can also install operating system updates and ROM objects into Flash ROM.

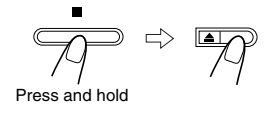
Apply power to the unit. When the  message appears in the display, quickly press and release the Transpose button. The segment displays the main menu of the Boot Loader and the first available option. Use the + or – button to advance to the next option.

The menu options are as follows:

Install Engine  — Installs new operating system software upgrades.

Update Boot block  — Installs boot block updates.

Run Diagnostics   — enters the diagnostic test menu. For a complete list of tests and the procedure to execute the diagnostic tests.

Run Engine    — Exits the boot block and returns the unit to normal operation.

Hard RESET  — Clears the memory to factory default settings.


Saturday, 31 October 2020

How to do adjustments, how to take out the disc in emergency, circuit descriptions, schematic-Samsung 3 CD CHANGER VIDEO CD MINI MINI COMPONENT-MAX-460V


How to take out the CD at emergency

1. If power is connected:

- Turn power on.

- Open the tray using the open/close key.

- Remove the Door in the direction of arrow.

2. If power is not connected:

- Turn the gear clockwise using a screw driver as shown in Figure.

- Pull the Tray in the direction of arrow @ and then remove the Door in the direction of arrow.

Tuner adjustment points

Cassette deck adjustments

Test Equipment needed

1. Oscilloscope

2. VTVM

TAPE

1. MTT-111 (or equivalent) : Test tape on which 3KHz signal is recorded (Tape speed adjustment)

2. MTT-5512 (or equivalent)

3. MTT-113CN (or equivalent) : Test tape on which 8KHz signal is recorded (Azimuth)

4. MTT-112B (or equivalent) : Test tape on which 1KHz signal is recorded (L.R. channel unbalance)

Adjustment Procedure

Tracing gain adjustment

Special circuit descriptions

RF Amp (KA9220) : NIC9220

RF I-V Amp(1) and RF I-V Amp(2) currents are converted to voltage via internal resistance of 58k½ from the current of PD1(A+C) and PD2(B+D):

These voltage are added by the RF summing amplifier. The signal (A+B+C+D) is applied to RFO (No. 2 terminal).

RF output voltage is calculated as follows :

VRF= -R3 x (iPD1 + iPD2)

VRF= -R3 x (V1/R1 + V2/R2)

VRF= -R3 x ( + )

VRF= - x (V1 + V2)

FOCUS ERROR Amp(KA9220) : NIC9220

FOCUS ERROR Amp amplifies the difference between RF I-V Amp(1) output (A+C) and RF I-V Amp(2) output(B+D).

These two signals are supplied to (-) and (+) input terminals of FOCUS ERROR Amp. The FOCUS ERROR output is applied to FE (Terminal No.57).

The FE output voltage of this low frequency component varies according to {(A+C) - (B+D)}.

VFE is calculated as follows:

VFE = (R2/R1) x (V2-V1) = 5.4(V2-V1)

This FOCUS ERROR voltage is sent to FOCUS SERVO .

FOCUS SERVO SYSTEM (KA9220) : NIC9220

When FS3 is ON, high frequency gain decreases (time constant set by pin17, pin19 ; capacitor is connected to internal resistance).

The capacitor between pin 18 and GND sets the time constant to pass the low frequencies in PLAY mode.

The maximum frequency of the focus phase compensation is inversely proportional to the resistance connected to pin 7. Focus search peak is about 1.1 Vp-p, and is inversely proportional to the resistance connected to pins 22,23

(if this resistance changes, the peak of track jump and sled kick change).

The inverted input of FZC comparator is set to 5.7% of the difference between Vcc and VC(pin69) {{5.7% x (Vcc-Vc)}.

Note : If the resistance connected to pin7 changes, the phase compensation peak of the focus tracking sled servos change. (The 'op-amp' dynamic range and offset voltage also change.)

TRACKING SLED SERVO SYSTEM (KA9220) : NIC9220

The capacitor between pin 15 and 16 attenuates high frequencies when TG2 is off. The maximum frequency of tracking phase compensation is inversely proportional to the resistance connected to pin 7 (about 1.2kHz at 470k).

The tracking jump (FWD and REV) is determined when TM3 and TM4 are ON, and the peak voltage induced from the tracking coil is determined by both TM3 and TM4 currents and the feed back resistance of pin 47.

Track jump max voltage = TM3 (TM4) current x feedback resistance.

FWD or REV sled kick occurs when TM5 or TM6 is ON, and the peak voltage added to sled motor (determined by TM5 or TM6 current and the feedback resistance of pin 41.)

Sled jump max. voltage = TM5(TM6) current x feedback resistance.

Each SW current is determined by the resistance connected to pin 22 and 23.

When the resistance is about 150½,

TM3 or TM4 = 11µA,

TM5 or TM6 = 22µA,

This current is inversely proportional to the resistor, variable within a range of t 5 to 40 µA for TM3.

STOP is the ON/OFF detection signal for the limit SW (or the sled motor's innermost circumference).

CD Pack Exploded View

Schematic diagram-Main board

Front board schematic

CD board schematic

Video CD board schematic

PCBs


Thursday, 29 October 2020

Sony TC95A, Gradente DS20, CCE DR1000, CCE CS930D, Sanyo RM5500M, Pioneer CT3131 Cassette Decks circuit diagram [Schematic]

 Gradente DS20 cassette deck, Gradente spec87 cassette deck, CCE DR1000 cassette deck, CCE CS930D cassette deck, Sanyo RM5500M cassette deck, Pioneer CT3131 cassette deck, Sony TC95A cassette deck

Used ICs: CX 0168, TBA 820M, LA4550, LA7343, LA1260, LA1160

CCE 930D schematic

CCE DR1000 Schematic

Gradente Spect87 Schematic

Gradente  DS20 schematic
Pioneer CT3131 Schematic
Sanyo RM5500M Schematic
Sony TC95A Schematic


Wednesday, 28 October 2020

JVC DVD DIGITAL THEATER SYSTEM THS11 CD-ROM No.SML200506 Service mode, schematic, try lock and unlock, region codes


TH-S11 TEST MODE

This player has a TEST MODE for product QC, service or repair.

Contents as follows. If the DVD TRAY is not completely closed, supply AC power and press POWER ON to close the TRAY.

After confirm that the TRAY is completely closed go to standby.

Once LED lights up, pull off the power plug. Reinsert the AC power plug to the outlet while pressing, “POWER" and "STOP" button at the front panel of the set.

TEST MODE has the 7 different steps. Press MENU key on the remote control to change the steps.

TEST MODE is canceled by the POWER key.

How to repair after carried out full-initialize

(1) Learning DVD

playback VT-501

(2) Learning CD

playback CTS-1000

(3) standby mode (push power key)

(4) Checking BCA

insert V-2805

test mode (press POWER and STOP button together during AC power plug in)

check mode (press menu key of remote controller)

BCA check (press +10 key of remote controller)

FL indication change "0000 0000" to "0000 0001" and Disc auto stop

(5) standby mode (push power key)

REGION CODES

Tray lock-Unlock

You can lock the tray and prohibit the unwanted disc ejection.

On the center unit ONLY:

While the system is on standby mode, press EJECT with STOP pressed and held.

The system turns on and “LOCKED” appears on the display window.

 If you try to eject the disc, “LOCKED” appears to indicate that the tray is locked.

To cancel

Carry out the same operation again.

 The system turns on and “UNLOCKED” appears on the display window.

Schematic diagram:  Transformer section

Regulator section

Micon section

Audio section

Video section

Front section

DVD servo control section

DVD servo control section (2/2)


Tuesday, 13 October 2020

LG 50PJ350 Plasma TV Power supply board troubleshooting, voltage details


Adjustment Notice:  All adjustments (DC or Waveform) are adjusted in WHITE WASH.  Customer’s Menu, Select “Options”, select “ISM” select “WHITE WASH”

It is critical that the DC Voltage adjustments be checked when;
1) SMPS, Y-SUS or Z-SUS board is replaced.
2) Panel is replaced, Check Va/Vs since the SMPS does not come with new panel.
3) A Picture issue is encountered.
4) As a general rule of thumb whenever the back is removed.

ADJUSTMENT ORDER “IMPORTANT” DC VOLTAGE ADJUSTMENTS
1) POWER SUPPLY: VS, VA (Always do first)
2) Y-SUS: Adjust –Vy, VSC
3) Z-SUS: Adjust Z-Bias (VZB)
WAVEFORM ADJUSTMENTS
1) Y-SUS: Set-Up, Set-Down

The Waveform adjustment is only necessary
1) When the Y-SUS board is replaced
2) When a “Mal-Discharge” problem is encountered
3) When an abnormal picture issues is encountered.


SWITCH MODE POWER SUPPLY [SMPS] SECTION

This Section of the Presentation will cover troubleshooting the Switch Mode Power Supply for the Single Scan Plasma. Upon completion of the section the technician will have a better understanding of the operation of the Power Supply Circuit and will be able to locate voltage and test points needed for troubleshooting and alignments.
DC Voltages developed on the SMPS
Adjustments VA and VS

Always refer to the Voltage Sticker located on the back of the panel, in the upper Left Hand side for the correct voltage levels for the VA, VS, -VY, VSC, and Z Bias as these voltages will vary from Panel to Panel even in the same size category.
Set-Up and Ve are just for Label location identification and are not adjusted in this panel.

SMPS Part Number: EAY60968701
Check the silk screen label on the top center of the Power Supply board to identify the correct part number. (It may vary in your specific model number).

Operation of this Power Supply.

The Switch Mode Power Supply Board Outputs to the :

Y-SUS Board

VS: Drives the Display Panel’s Horizontal Electrodes.

VA: Drives the Display Panel’s Horizontal Electrodes.

M5V: Used to develop Bias Voltages on the Y-SUS then routed to the Control board and then to the Z-SUS Board.

Z-SUS Board

VS: VS is routed to the Y-SUS first then to the Z-SUS board which Drives the Display Panel’s Horizontal Electrodes.

Main Board

STBY 5V:  Microprocessor Circuits

17V:  Audio B+ Supply, Tuner B+ Circuits 5V Signal Processing Circuits

Also AC-Det (if missing, shuts of TV in 10 seconds) and Error-Det (not used)

Adjustments

There are 2 adjustments located on the Power Supply Board VA and VS. The M5V is pre-adjusted and fixed. All adjustments are made referenced to Chassis Ground. Use “Full White Raster” 100 IRE

VS: VR901

VA: VR502

Power Supply Basic Operation

AC Voltage is supplied to the SMPS Board at Connector SC101 from the AC Input assembly, routed to the Standby 5V supply. The STBY5V (standby) is B+ for the Controller chip on the back of the board (IC701) on the SMPS and output at P813 pins 13 and 14 then sent to the Main board for Microprocessor (IC1) operation (STBY 3.46V RUN 5.14V).

When the Microprocessor (IC1) on the Main Board receives a “POWER ON“ Command from either the Power button or the Remote IR Signal, it outputs a high (2.43V) called RL_ON at Pin 15 of P813. This command causes the Relay Circuit to close both Relays RL101 and RL103 routing AC to the Bridge Rectifier D101 which then routes the primary voltage to the PFC circuit (Power Factor Controller) 388V which can be read measuring voltage at Fuses F302 and F801 from “Hot” Ground. AC Detection (AC Det) is generated on the SMPS, by rectifying a small sample of the A/C Line and routed to the Controller (IC701) where it outputs at P813 pin 16 (4.44V) and sent to P301 to the Main Board where it is sensed and monitored by the Main Microprocessor (IC1). If AC Det is missing the set will come on, but shut off in 10 seconds.
When RL_ON arrives, the run voltage +5V source becomes active and is sent to the Main Board via P813 (5.17V at pin 5, 6 and 7). The (Error Det) from the SMPS Board to the Main Board can be measured at pin 8 of P813 (2.85V STBY and 4.90V RUN), but it is not used. The RL-ON command also turns on the 17V (Audio B+) which is also sent to the Main Board. The 17V Audio supply outputs to the Main board at P813 pins 1 and 2 and used for Audio processing and amplification.

The next step is for the Microprocessor IC1 on the Main Board to output a high (3.29V) on M_ON Line to the SMPS at P813 Pin 17 which is sensed by the Controller IC701, turning on the M5V line and outputs at P812 pins 9 and 10 to the Y-SUS
board.

The Controller (IC701) also uses the M_ON line to turn on the VA and the VS supplies. (Note there is no VS On Command in this set). VS is output at P812 to the Y-SUS board P210. (VA pins 6 and 7 and VS pins 1 and 2). Note: The Va is fused
on the Y-SUS then routed out P203 to the X-Board Left. VS is also routed out of the Y-SUS P211 pins 4 and 5 to the Z-SUS P2.

AUTO GND Pin 18 of P813: This pin is grounded on the Main board. When it is grounded, the Controller (IC701) works in the normal mode, meaning it turns on the power supply via commands sent from the Main board. When AUTO GND is
floated (opened), it pulls up and places the Controller (IC701) into the Auto mode. In this state, the Controller turns on the power supply in stages automatically. A load is necessary to perform a good test of the SMPS if the Main board is suspect.

50PJ350 SMPS STATIC TEST UNDER LOAD

Using two 100 Watt light bulbs, attach one end to Vs and the other end to ground. Apply AC to SC101. If the light bulbs turn on and VS is the correct voltage, allow the SMPS to run for several minutes to be sure it will operate under load. If this test is successful and all other voltages are generated, you can be fairly assured the power supply is OK.
Note: To be 100% sure, you would need to read the current handling capabilities of each power supply listed on the silk screen on the SMPS and place each supply voltage under the appropriate load.

50PJ350 Power Supply Troubleshooting

With P813 disconnected from the Main board (P301) attach two 100 Watt light bulbs, attach one end to Vs and the other end to ground.
Apply AC to SC101. If the light bulbs turn on and VS is the correct voltage, allow the SMPS to run for several minutes to be sure it will operate under load. If this test is successful and all other voltages are generated, you can be fairly assured the power supply is OK.
Note: To be 100% sure, you would need to read the current handling capabilities of each power supply listed on the silk screen on the SMPS and place each supply voltage under the appropriate load. Then follow the instructions below to completely test turn on sequence.

When the supply is operational in its normal state the Auto Ground line at Pin 18 of P813 is held at ground by the Main Board.
This Power Supply can be powered on sequentially to test the Controller Chip IC701 operational capabilities and for troubleshooting purposes.
Disconnect P301 from the Main board and use the holes in that end of the connector to insert the jumper and resistors.

Warning: Remove AC before adding or removing any plug or resistor.

Note: Leave previous installed 100Ω resistor in place when adding the next resistor.

Ground the Auto Gnd Line (Pin 18) will allow the supply to be powered up one section at a time.
(B) Add a 100Ω ¼ watt resistor from 5V Standby to RL_ON and the AC Det, 17V and 5V Lines on P813 will become active.
(C) Add a 100Ω ¼ watt resistor from any 5V line to M_ON (Monitor_On) to make the M5V, VS and VA lines operational.
P812 (VS pins 1 and 2) (VA pins 6 and 7) and (M5V pins 9 and 10).

SMPS Connector P813 Identification, Voltages and Diode Check

a Note: The 17V, 5V, AC_Det and Error Det turn on when the RL_On command arrives.
b Note: The M5V, Va and Vs turn on when the M_On (Monitor On) command arrives.
c Note: The Error Det line is not used in this model.
d Note: If the AC Det line is Missing, the TV will shut off after 10 seconds of operation.
e Note: Pin 18 is grounded on the Main board. If this line is floated, the SMPS turns on Automatically when AC is applied.

SMPS Connector SC101 and P812 Identification, Voltages and Diode Check

Diode Mode Readings taken with all connectors Disconnected. DVM in Diode Mode.


LG 52LG50FD, 52LG50FD-SA-Service adjustments-service mode entry-white balance adjustment-ADC component 1 RGB adjustment and more

  These adjustments are similar to 42LB7DF Because this is not a hot chassis, it is not necessary to use an isolation transformer. However...