MCM275 Philips Microsystem, disassemble procedure, circuit diagram [full schematic]
1) Press the 2 latches and push the Panel as shown in
fig.
2) Loosen the 5 screws A and 6 B to remove the Rear Cabinet as shown in fig. 2.
3) Loosen the 3 screws C to remove the SP &
ANT panel as shown in fig. 3.
4) Loosen the 5 screws D to remove the Power
Module as shown in fig. 3
5) Loosen the 2 screws E and remove the Support
Panel as shown in fig. 4.
6) Loosen the 3 screws F to remove the Main Panel
as shown in fig. 5.


Disassembly of the Lens Display and
the Volume button
1) Use a screwdriver to pull in the direction shown
in fig. 6.
2) Place two small screwdrivers between the front
of the case and the button and lift it up, removing the Volume button as shown
in fig. 7.
Disassembly of the CD Module and CD
Holder
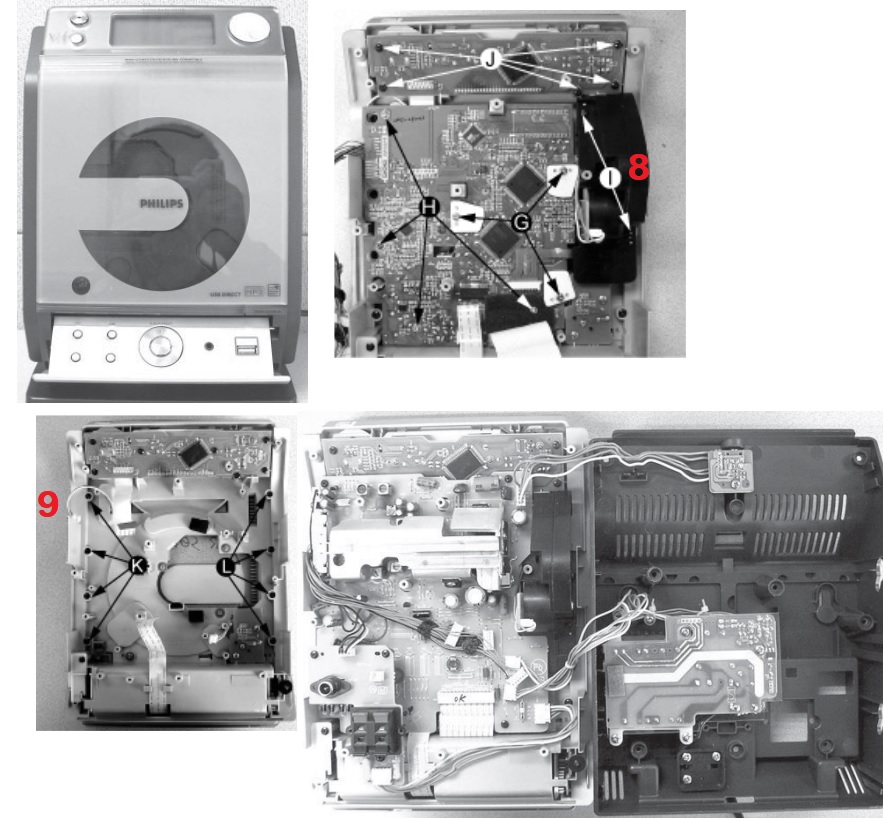
1) Loosen the 5 screws J of the Keyboard Panel in
the Front Cabinet to remove it as shown in fig. 8.
2) Loosen the 4 screws H and 3 G of the CD Module
as shown in fig. 8.
3) Loosen the 2 screws I to remove the Motor
Mechanism from the Servo as shown in fig. 8.
4) Loosen the 4 K screws to remove the Right CD
Door and the 4 L screws to remove the Left CD Door as shown in fig. 9.
Note: After reassembly, it is very important to
ensure that all wires are properly fitted so that they do not touch / obstruct
the movement of the parts.